

Declutter Kitchen Counters Fast: 7 Steps That Work
Table of Contents
- Why Kitchen Counters Become Cluttered (And How Psychology Plays a Role)
- What You'll Need Before You Start Decluttering
- Step 1: Clear the Flat Surface Completely
- Step 2: Categorize Items, Keep, Store, or Toss
- Kitchen Counter Organization Ideas That Actually Reduce Visual Noise
- How to Keep Kitchen Counters Clear Through Daily Habits
- Small Kitchen Counter Storage Solutions for Tight Spaces
- Daily Kitchen Decluttering Routine for Long-Term Success
Declutter Kitchen Counters Fast: 7 Steps That Work
Last Updated: July 27, 2026
Learning how to declutter kitchen counters fast doesn't require a complete kitchen overhaul or expensive organizational systems. At Viva homeStore, we've helped thousands of homeowners transform their kitchens by addressing the root causes of counter clutter rather than just moving things around. The real challenge isn't finding storage, it's breaking the habits that let clutter accumulate in the first place. Below, we'll show you exactly how to declutter kitchen counters fast using a practical seven-step system that works whether you have a sprawling countertop or a tiny studio kitchen.
Why Kitchen Counters Become Cluttered (And How Psychology Plays a Role)
Most people treat kitchen counters like temporary holding zones. You set something down "just for now," and three weeks later it's part of the landscape. Flat surfaces invite accumulation because they're the path of least resistance. The real problem isn't laziness, it's that your kitchen workflow doesn't match your physical space. When appliances, utensils, and ingredients don't have designated homes, your counter becomes the default storage system.
Understanding this psychology changes how you approach decluttering. You're not fighting against yourself or your family's nature. You're designing a system that works WITH how people actually behave. When something has a logical, accessible home, people put it away.
What You'll Need Before You Start Decluttering
Physical supplies and containers
Gather three large bags or boxes labeled "Keep," "Store," and "Toss." You'll also need a cleaning cloth, all-purpose surface cleaner, measuring tape, and your phone or notebook to jot down ideas. You can't assess what's worth keeping until you can see the counter itself.
Mental preparation and workflow planning
Spend five minutes mapping your kitchen zones. Where do you prep food? Where do you cook? Your counter organization should support these actual workflows. Be honest about what you actually use. If you haven't made fresh juice in two years, that juicer isn't earning its counter space.
Step 1: Clear the Flat Surface Completely
Remove everything from your kitchen counters. Place items into three piles: items you use daily or weekly, items you use monthly or seasonally, and everything else. Daily-use items go back on the counter. Monthly-use items get stored in cabinets or pantries. Everything else gets evaluated for whether it truly belongs in your kitchen.
This complete-clear approach forces you to make conscious decisions about each item rather than just rearranging what's already there. As you clear, wipe down the entire counter surface. Seeing a clean, empty counter creates psychological momentum.
Step 2: Categorize Items, Keep, Store, or Toss
Keep items are things you use at least weekly and need immediate access to. Your coffee maker if you make coffee every morning. Your cutting board if you prep meals daily. These items earn counter space because they're part of your actual workflow.
Store items are things you use regularly but not daily. Your stand mixer if you bake weekly but not daily. Your food processor if you use it for meal prep. These items live in cabinets, pantries, or under-cabinet storage and come out when needed.
Toss items are anything broken, unused, or taking up space without adding value. That chipped mug you've been meaning to use for plants. The specialty gadget that promised to change your life but sits unused. Be ruthless here, your counter space is premium real estate.
| Category | Examples | Storage Location |
|---|---|---|
| Keep (Daily Use) | Coffee maker, cutting board, utensil holder, soap dispenser | Kitchen counter |
| Store (Weekly/Monthly) | Stand mixer, food processor, blender, slow cooker | Cabinet, pantry, or under-cabinet storage |
| Toss | Broken items, unused gadgets, expired products, decorative clutter | Donation, recycling, or trash |
A common mistake is keeping "just in case" items on your counter. These items belong in deep storage, not on your counter where they create visual noise and take up valuable workspace.
Kitchen Counter Organization Ideas That Actually Reduce Visual Noise
Using attractive containers and drawer dividers
Once you've decided what stays on your counter, containment is your next priority. A utensil holder with 15 loose items looks chaotic. The same items in a single attractive container look intentional. Grouping related items together and placing them in containers dramatically reduces visual noise.
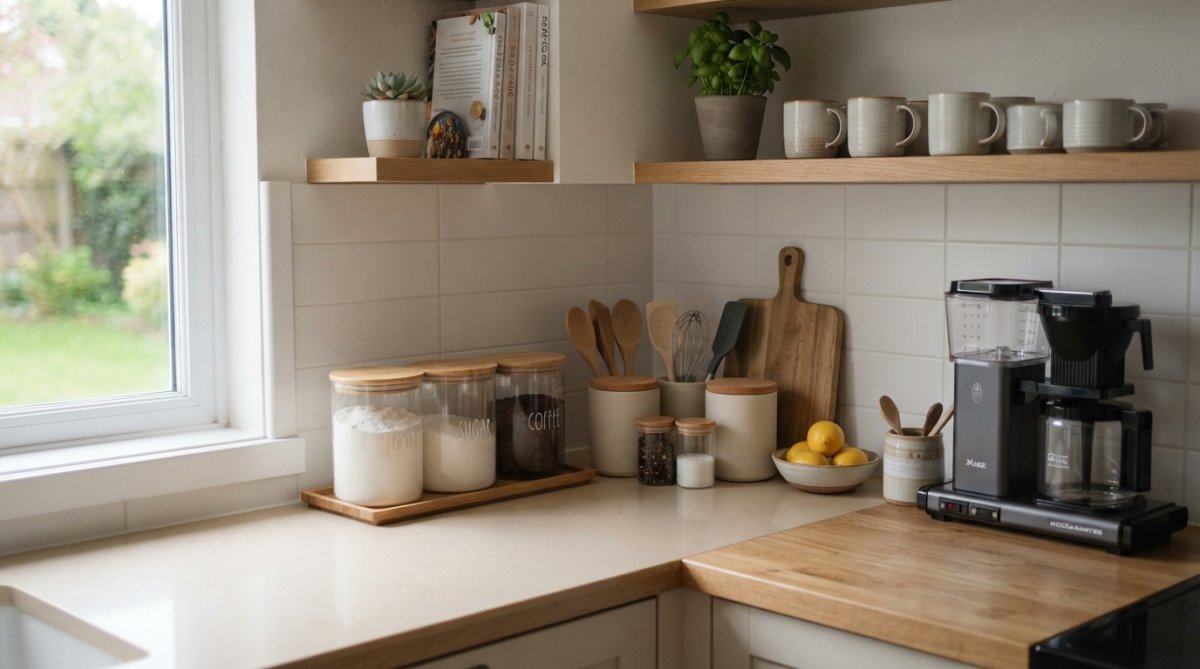
Drawer dividers serve the same purpose for items stored inside cabinets. Your cooking utensils, measuring spoons, and kitchen scissors should each have their own section. Choose containers that match your aesthetic and maintain consistency, using one style repeated looks intentional.
(https://bys-store-3095366-288625.myshopify.com/blogs/news/durable-storage-bins-that-actually-last) Reduce Visual Noise]Viva homeStore offers a curated selection of organizational containers specifically designed for kitchen use. Purpose-built containers are sized for actual kitchen items rather than generic storage boxes.
Vertical storage and magnetic strips for appliances
Your counter has two dimensions, but your walls have unlimited potential. Vertical storage immediately reduces counter clutter by moving items up instead of out. Magnetic strips mounted on the wall or inside cabinet doors hold metal kitchen tools, knives, scissors, and measuring spoons. Wall-mounted shelving above your counter creates storage for items you use regularly but don't need immediate access to.
For appliances, ask whether they earn permanent counter space. Your daily-use coffee maker probably does. Your occasional-use food processor probably doesn't. Small appliances that live in cabinets can be stored vertically using stackable shelf risers or pull-out cabinet organizers.
Under-cabinet storage and kitchen island solutions
Under-cabinet space is one of the most underutilized storage areas in kitchens. Pull-out organizers, hanging racks, and adhesive hooks transform this wasted space into functional storage. A pull-out spice rack under your cabinet keeps spices organized without occupying counter space.
If you have a kitchen island, use open shelving on the lower level for cookbooks or serving platters, and drawers for larger utensils. For renters or those without islands, a narrow rolling cart fits between appliances or in corner spaces and provides three tiers of storage.
How to Keep Kitchen Counters Clear Through Daily Habits
The One-In, One-Out Rule for intentional living
Once you've cleared your counters, implement the one-in, one-out rule: for every new item that lands on your counter, something existing must leave. This isn't about deprivation, it's about intention. Before you buy a new kitchen gadget, decide what it will replace.
The one-in, one-out rule extends to paper and digital clutter too. Designate a single recipe binder or digital folder. When you add a new recipe, remove one you'll never make.
End-of-day tidying and cleaning routine
A five-minute end-of-day routine prevents counter clutter from rebuilding. After dinner, clear your counter of cooking items, wipe down surfaces, and return everything to its designated home. Start by clearing food prep items and placing them directly in the sink or dishwasher. Wipe down any spills or crumbs. Return items to their homes.
A clean counter affects your morning. You're more likely to prepare a proper breakfast when you have workspace. Make this routine non-negotiable. Most people find that once they do this for two weeks, it becomes automatic.
Small Kitchen Counter Storage Solutions for Tight Spaces
In apartments and small kitchens, every inch matters. The good news is that small spaces force intentionality. You can't keep things "just in case" because there's literally no space for them.
Wall-mounted storage becomes essential. A single shelf above your counter holds cookbooks or frequently used ingredients. Magnetic strips on the side of your refrigerator hold metal utensils. A pegboard above your counter creates customizable storage for cooking tools.
Drawer dividers become more critical in small spaces. A single drawer with proper dividers can hold what would otherwise require two drawers. Under-cabinet space is gold in small kitchens. A simple pull-out shelf doubles the usable storage in that space.
For renters, removable adhesive hooks and command strips provide storage without damaging walls. A narrow rolling cart fits in tight spaces and provides three tiers of storage. Choose multi-functional items: a cutting board that doubles as a serving platter, a utensil holder that also functions as a vase.
Daily Kitchen Decluttering Routine for Long-Term Success
The difference between people whose kitchens stay organized and those who return to clutter is consistency, not willpower.
Morning (2 minutes): Review your counter as you make breakfast. Are there items from yesterday that didn't get put away? Move them to their homes.
During cooking (ongoing): Put items away immediately after using them rather than leaving them on the counter "for later." Grab the cutting board, wash it, and put it away while your water boils.
After meals (5 minutes): Clear your counter completely. Wash or load items, wipe surfaces, return everything to its designated home.
Weekly (15 minutes): Do a deeper assessment. Are items still in their designated homes? Have new items accumulated? Are there items you haven't used all week that should be stored elsewhere?
Once you maintain these habits for 30 days, they become automatic. Your brain stops treating the counter as a holding zone and starts expecting it to be clear.
A cluttered kitchen counter isn't inevitable, it's the result of systems that don't match your actual workflow. By implementing these seven steps, you create a kitchen that works for your daily life rather than against it. Viva homeStore's curated selection of organizational containers, vertical storage solutions, and kitchen essentials makes it easy to maintain your newly organized counter. Start with the complete clear, implement the one-in, one-out rule, and commit to a five-minute daily routine. Within weeks, you'll have a kitchen that functions better and looks better. Shop now and discover how the right organizational tools transform your kitchen from chaotic to intentional.
Frequently Asked Questions
What's the fastest way to declutter kitchen counters if I only have 30 minutes?
Start by removing everything from your counter into a box. Wipe the surface clean. Then place back only essential items, your coffee maker, utensil holder, or cutting board. Everything else goes into storage, a drawer, or gets tossed. This 'clear first, organize second' method is faster than trying to organize while items sit on the counter. Focus on creating counter space before perfecting arrangement.
How do I keep kitchen counters clear daily without spending hours on organization?
Adopt the One-In, One-Out Rule: for every new item that lands on your counter, one must leave or be stored. Set a 5-minute end-of-day tidying habit, wipe surfaces and return items to their homes. Assign a 'landing zone' (like a small tray) for mail, keys, or temporary items so they don't scatter. This daily kitchen decluttering routine prevents buildup and keeps visual noise minimal without major effort.
What kitchen counter storage solutions work best for small apartments or studios?
Vertical storage is your best friend in tight spaces. Use wall-mounted magnetic strips for knives, under-cabinet hooks for mugs, and stackable drawer dividers inside cabinets. Attractive containers that match your décor help maximize vertical space while keeping items accessible. A slim kitchen island or a narrow cart on wheels can provide additional counter surface without taking up permanent floor space. Choose multi-functional pieces that serve storage and prep purposes.
Should I keep appliances on my kitchen counters, or store them away?
Keep only daily-use appliances visible, your coffee maker, toaster, or blender if you use it every morning. Seasonal or occasional appliances (waffle makers, food processors, slow cookers) belong in under-cabinet storage, pantry shelves, or a kitchen island with enclosed storage. This reduces visual noise and counter clutter while keeping frequently used items accessible. Group similar appliances together and use attractive containers or shelving to maintain an organized, intentional appearance.
This article was written using GrandRanker