

Kid-Friendly Snack Station Ideas for an Organized Home
Table of Contents
- Why a Self-Serve Snack Station Works for Families
- Snack Station Organization Tips for a Tidy Setup
- How to Manage Snack Portions for Kids Without Power Struggles
- DIY Snack Station Containers: Practical Picks That Last
- Age-Approach: Toddler-Friendly vs. Older Kid Stations
- Allergy-Safe and Dietary-Specific Snack Stations
- Seasonal Rotation and Eco-Friendly Storage Ideas
- Conclusion
- Frequently Asked Questions
Last Updated: September 29, 2026
Why a Self-Serve Snack Station Works for Families
A kid-friendly snack station is a dedicated, low shelf or drawer where children can grab their own snacks without asking an adult. It puts healthy options within reach and hands kids a little independence at the same time.
The benefits show up fast:
- Kids build independence and make small choices on their own
- Parents save time on constant snack requests
- Healthy snacks stay visible instead of buried in the back of the pantry
- Fewer arguments, because the rules are built into the setup
Snack Station Organization Tips for a Tidy Setup
The best snack station is one your child can reach, see through, and restock themselves. Clear containers do the heavy lifting here. When kids can see what's inside, they pick faster and you spend less time answering "what do we have?"
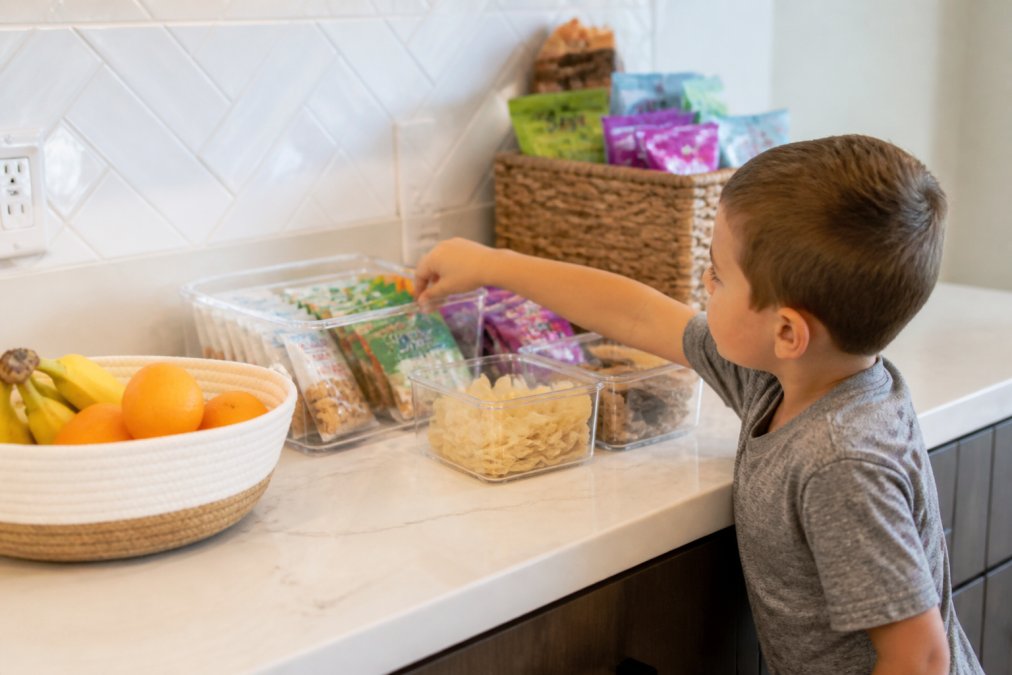
Start with these basics:
- Use clear, open bins. No lids, no digging.
- Group by type. Fruit in one bin, protein in another, grains in a third.
- Label everything. Pictures for toddlers, words for older kids.
- Keep it low. The bottom pantry shelf or a low drawer works best.
- Leave breathing room. A crowded station gets messy fast.
Choosing the Right Spot: Pantry vs. Fridge
Pantry or fridge comes down to what you're storing. Shelf-stable snacks like crackers, granola bars, and dried fruit belong in the pantry. Refrigerated snacks like yogurt, cheese sticks, and pre-cut vegetables need the fridge.
How to Manage Snack Portions for Kids Without Power Struggles
Portion control works best when the setup does the deciding, not you. Pre-portion snacks into small containers or bags at the start of the week. Then kids grab one container, not a handful from a big bag.
A few strategies that cut down on over-snacking:
- Single-serve bins. One bin, one snack.
- A daily limit. Two snacks from the station per day, then it's closed.
- A snack schedule. Set times for snacks so grazing doesn't run all day.
- Pair protein with carbs. A cheese stick plus crackers keeps kids full longer than crackers alone.
DIY Snack Station Containers: Practical Picks That Last
Here's how the common options actually compare:
- Clear polypropylene (PP) bins. The workhorse. Lightweight, dishwasher-safe on the top rack, and cheap enough to replace. Downside: it scratches and clouds over time, and thin walls crack under a dropped lid. Look for recycling code 5. Avoid PVC (code 3) and polystyrene (code 6) for food storage.
- Tritan and copolyester. Clearer and more shatter-resistant than standard PP, and BPA-free. Costs more per bin but survives years of kid handling. A good middle ground if you want glass-like clarity without glass risk.
- Glass with silicone sleeves. Best for fridge items and anything acidic (tomato, citrus) because glass doesn't stain, hold odors, or leach. The trade-off is weight and breakage, a dropped glass container on a tile floor is a real hazard for a toddler-height station. Use glass on upper fridge shelves, not the low open shelf.
- Stainless steel. Unbreakable, non-reactive, and easy to sanitize. The catch: kids can't see inside, which defeats the self-serve "see it, grab it" principle. Best for airtight dry-goods storage you refill into a clear display bin.
- Silicone pouches and cups. Great for portioning and for fridge or lunchbox use. Not rigid, so they don't stack well on a shelf.
Two features matter more than brand:
- Lid resistance. If your child can't open it one-handed, the station stops working. Test the latch before you commit to a set.
- Cleanability. Wide-mouth openings and no deep crevices. A bin that traps crumbs in a seam becomes a science experiment.
Age-Approach: Toddler-Friendly vs. Older Kid Stations
A toddler station looks nothing like a station for a ten-year-old. Match the setup to what your child can safely handle.
Toddler-friendly station (ages 2-4):
- Soft, easy-to-chew snacks only
- No choking hazards like whole nuts or popcorn
- Picture labels, no words
- Low shelf, no lids
- Small portions, refilled often
Older kid station (ages 5-12):
- A wider range of healthy snacks
- Word labels and a simple "two per day" rule
- A small fridge drawer for yogurt and cheese
- A spot for a water bottle
Allergy-Safe and Dietary-Specific Snack Stations
An allergy-safe station keeps problem foods completely separate. If your child has a food allergy, the station needs its own bins, its own shelf, and clear labels. Cross-contact is the real risk, not just the food itself.
For dietary needs, the same logic applies:
- Gluten-free: its own labeled bin, sealed to prevent crumbs
- Nut-free: check every label, every time
- Dairy-free: keep plant-based options in a marked fridge drawer
Seasonal Rotation and Eco-Friendly Storage Ideas
Most guides treat "rotate your snacks" as a vague suggestion. A real rotation system is calendar-based, tied to what's actually in season and what your kid's schedule looks like, and it doubles as a behavioral tool, because novelty is what keeps a self-serve station from going stale.
Build a rotation calendar around three anchors:
- Produce seasonality. Summer: berries, stone fruit, melon, cucumbers, cherry tomatoes. Fall: apples, pears, grapes, squash-based snacks. Winter: citrus, pomegranate, dried fruit, root vegetables. Spring: strawberries, snap peas, radishes. Buying in season is cheaper and tastes better, which matters when you're competing with packaged snacks.
- School schedule. Rotate toward shelf-stable, grab-and-go items during busy school weeks, and toward fresh, perishable items during breaks when you're home to manage the fridge. A station stocked for a school morning looks different from one stocked for a summer afternoon.
- A four-week reset. Swap one or two items every four weeks rather than overhauling everything. Kids accept small changes; a total reset reads as "the good snacks are gone."
Eco-friendly storage that actually holds up:
- Swap single-use plastic bags for reusable silicone pouches or small stainless containers. Silicone pouches are freezer- and dishwasher-safe and survive years of use.
- Use glass or stainless steel for pantry staples you buy in bulk. Glass doesn't stain or hold odors; steel is unbreakable.
- Buy snacks in bulk and portion them yourself. This cuts packaging waste and usually costs less per serving than single-serve packs.
- Compost fruit scraps and vegetable trimmings where your municipality allows it. Check your local waste authority's rules, curbside compost programs vary widely by city.
- Skip "compostable" PLA plastics unless your area has industrial composting. In a home bin or landfill, they behave like regular plastic.
Conclusion
Building a kid-friendly snack station takes an afternoon, but the payoff lasts. Kids get independence, you get fewer interruptions, and healthy snacks actually get eaten. The trick is matching the setup to your child's age and your kitchen's layout.
American Academy of Pediatrics healthy snack guidance
Frequently Asked Questions
What are the best healthy snacks for a kid-friendly snack station?
Stock your snack station with a mix of shelf-stable and refrigerated options. Good choices include whole grain crackers, string cheese, yogurt tubes, pre-cut vegetables like baby carrots and cucumber slices, apple slices, and protein-rich snacks such as nut butter packets or hard-boiled eggs. Aim for a balance of carbohydrates, protein, and healthy fats to keep kids full. Use clear containers so kids can see what's available and make their own choices. Rotate items weekly to keep things interesting and reduce waste.
How do I keep kids from overeating at a self-serve snack station?
Portion control is key. Pre-portion snacks into small bags or containers so kids grab one serving at a time. Set clear rules, like one snack per sitting, and keep the station closed between designated snack times. Offer water instead of juice to discourage mindless sipping. You can also include a visual chart with snack times. Involving kids in choosing and preparing snacks builds ownership and reduces the urge to overindulge. Consistency helps them learn to listen to hunger cues.
Where is the best place to put a snack station in the kitchen?
The best spot is a low shelf or drawer in the pantry or fridge that kids can reach without help. If your pantry is small, designate a bottom shelf for snacks and a lower fridge drawer for refrigerated items. Keep it away from the stove and sharp objects. A dedicated bin or turntable keeps items contained. For toddlers, place the station at their eye level to encourage independence. Make sure the location is easy to see and access during after-school routines.
How do you organize a snack station for toddlers versus older kids?
Toddlers need simple, safe access: use small, lightweight containers with easy-open lids, and stock only ready-to-eat items like soft fruit, crackers, and cheese sticks. Avoid choking hazards like whole grapes or nuts. For older kids, include a wider variety and let them assemble their own snacks, like making trail mix or spreading nut butter. Label bins with pictures for toddlers and words for older kids. Both age groups benefit from clear categories: fruits, veggies, protein, and treats.
A messy snack drawer can undo the best intentions. Viva homeStore helps you fix that with clear storage bins, stackable containers, and kitchen organizers designed for daily use. Our curated selection focuses on functional pieces that hold up, not just look good. Get started with Viva homeStore and turn snack time into one less thing to manage.