

Organizing Kids' Lunch Packing Stations: 2026 Guide
Table of Contents
- Why a Lunch Packing Station Beats Morning Chaos
- Step 1: Pick the Right Spot and Zone Your Kitchen
- Step 2: Stock the Station With the Best Containers for School Lunches
- Step 3: Set Up Pantry, Fridge, and Snack Bin Storage
- Step 4: Build a Grab-and-Go System Kids Can Run
- Healthy School Lunch Packing Tips That Save Time
- Budget-Friendly DIY Organizers and Maintenance
- Frequently Asked Questions
Last Updated: September 28, 2026
Why a Lunch Packing Station Beats Morning Chaos
Organizing kids' lunch packing stations is the single change that turns frantic school mornings into a calm, repeatable routine. A lunch packing station is a dedicated kitchen zone where all lunch supplies, containers, and grab-and-go snacks live together so kids can assemble their own meals without hunting through cabinets.
Mornings get much smoother when everything has one home. Instead of three people searching for a matching lid, one child packs a full lunch in minutes.
The biggest mistake is treating lunch prep as a daily scramble instead of a system. When supplies are scattered, you buy duplicates, food gets wasted, and mornings run late. A station fixes all three problems at once.
Here's how to build one that actually lasts past the first week.
Step 1: Pick the Right Spot and Zone Your Kitchen
The best spot for a lunch packing station is a low cabinet or drawer near the fridge, ideally one your child can reach without a stool. Proximity to the fridge and pantry cuts walking time and keeps the workflow in one place.
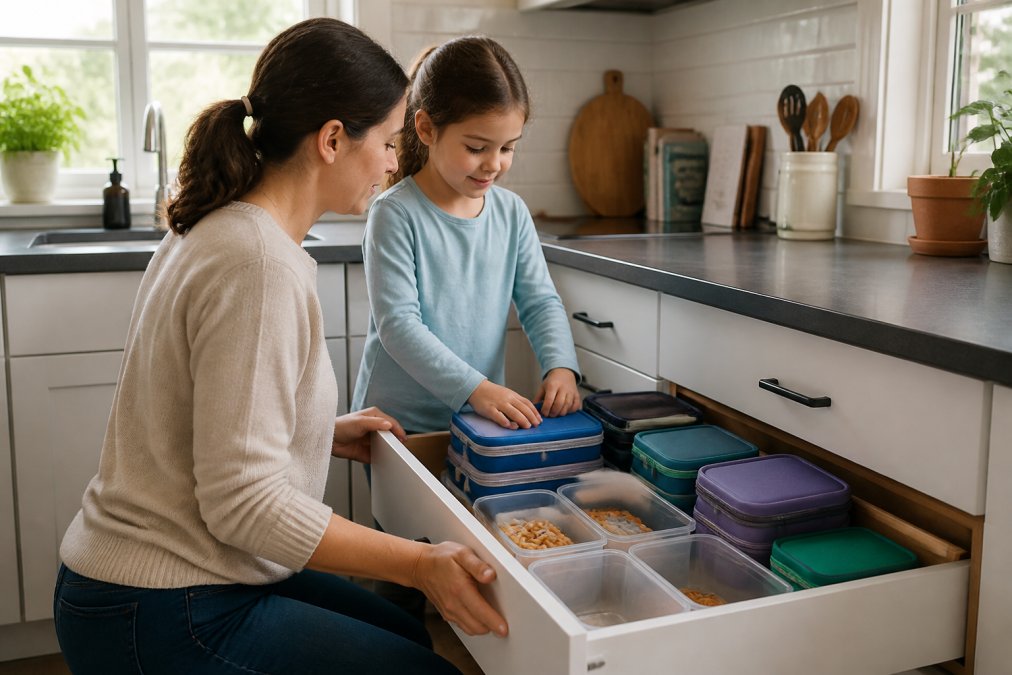
Measure your available space first. You need room for containers, a snack bin, and a spot for lunch bags. A single lower cabinet plus one drawer usually covers it.
Think of your kitchen in zones: prep, storage, and grab-and-go.
Allergy-Safe Zoning for Shared Kitchens
If your household manages food allergies, zoning matters even more. The Food Allergy Research & Education guidance on avoiding cross-contact recommends keeping allergen-free foods physically separate from other items.
Step 2: Stock the Station With the Best Containers for School Lunches
The best containers for school lunches are leak-proof, kid-friendly, and sized to fit your lunch bag. Bento-style boxes with separate compartments work well because they keep foods apart and reduce the number of lids kids have to manage.
Look for these features when you shop:
- Leak-proof seals that survive a backpack ride
- Compartments sized for a main, a side, and a snack
- Lids a young child can open alone
- Materials that go in the dishwasher
Step 3: Set Up Pantry, Fridge, and Snack Bin Storage
Pantry organization makes or breaks the station. Clear containers, labels, and one designated snack bin let kids grab what they need without digging.
| Zone | What Goes There | Kid-Reachable? |
|---|---|---|
| Pantry shelf | Crackers, bars, fruit cups | Yes |
| Fridge drawer | Cheese, yogurt, cut veggies | Yes |
| Snack bin | Single-serve grab-and-go items | Yes |
| Upper shelf | Bulk backstock | No |
Small Space and Apartment Solutions
Tight kitchens don't need a whole cabinet. A rolling cart, a stacking bin set, or a single deep drawer can hold a full station.
Step 4: Build a Grab-and-Go System Kids Can Run
A grab-and-go system works when kids can complete every step alone. That means everything lives at their height, in labeled spots, in the same place every day.
Label the station so no one has to ask
Labels do more work than any lecture about independence. Use three label types:
- Bin labels for categories ("Snacks," "Fruit," "Drinks")
- Shelf labels for what belongs on each level
- A photo label on the snack bin for pre-readers, so a four-year-old can match the picture to the bin
Post the order of operations inside the cabinet door
Tape a simple checklist where kids see it while they pack. Laminate it or slide it into a clear sleeve so it survives spills.
- Pick a container
- Add a main item from the fridge
- Add two snacks from the bin
- Add a drink
- Close the bag and place it by the door
Match the task to the age
Independence builds in stages, not all at once. A workable progression:
| Age range | What they can own |
|---|---|
| 3-5 | Pick one snack from a pre-portioned bin; drop the bag by the door |
| 6-8 | Pack a full lunch from labeled bins with a posted checklist |
| 9-11 | Choose their own combination within your formula; add an ice pack |
| 12+ | Portion snacks, restock their own bin, and check expiration dates |
Build in a self-check so you're not the inspector
Instead of opening every bag, teach a three-question self-check kids run before zipping up:
- Did I pack a main, a fruit or veggie, and a snack?
- Is there a cold source if I packed something perishable?
- Is the bag by the door, not on the counter?
Healthy School Lunch Packing Tips That Save Time
Healthy school lunch packing tips start with prep-ahead. Wash and cut veggies, portion snacks, and cook proteins on the weekend so weekdays need assembly only.
Budget-Friendly DIY Organizers and Maintenance
You don't need to spend much to build a station, and you don't need a big cleaning project to keep it running. This is the part most guides skip: what happens in week six, after the novelty wears off.
DIY organizers from what you already own
Before you buy anything, shop your own kitchen:
- Shoeboxes and gift boxes, sturdy enough for snack bins, and free to replace
- Reused glass jars, good for bulk snacks, but keep them on an upper shelf if you have young kids
- Plastic takeout containers, fine for dry snacks like crackers or pretzels, never for liquids
- A cardboard six-pack carrier, holds condiment packets or drink pouches upright
- An over-the-door shoe organizer, cut down to fit a cabinet door, it holds small snacks at kid height
Label everything with tape and a marker. It's cheap, and it tells every family member where things belong. Skip anything that can't survive a wipe-down or a dishwasher cycle, a bin that's hard to clean becomes a bin nobody wants to touch.
The weekly reset (ten minutes)
Pick one day, Sunday evening works for most families, and run the same short routine:
- Wipe bins, drawer fronts, and shelf edges with a damp cloth
- Check for cracked lids, missing containers, and stray parts; toss or match them
- Restock the snack bin from backstock
- Wipe the fridge lunch drawer and check for anything past its date
The monthly deep clean
Once a month, go one level deeper:
- Pull every bin out and wash it with warm soapy water or run it through the dishwasher if it's rated for it
- Wipe down the inside of the cabinet or drawer, including the corners where crumbs collect
- Check expiration dates on shelf-stable snacks and pull anything expired
- Re-sort containers and lids; recycle or repurpose anything without a match
If your household manages food allergies, add one step: wipe the allergy-safe bin and its shelf separately, with its own cloth, before you wipe anything else. That keeps the dedicated zone genuinely separate instead of separate in name only.
A restock trigger beats a restock schedule
Calendars get ignored. A visual trigger doesn't. Try one of these:
- The line method, draw a line on the snack bin with a marker at the level where it needs refilling
- The empty-bin rule, when a category bin is empty, it gets refilled that day, not "sometime"
- The clipboard list, keep a running list taped inside the cabinet door; anyone who takes the last of something writes it down
Maintenance is the difference between a station that works in October and one that still works in May. Ten minutes a week, one deeper clean a month, and a restock trigger that lives in the bin, not on your calendar, keep the system running without anyone having to remember it.
Frequently Asked Questions
What is the best way to organize a lunch packing station for kids?
Pick a dedicated kitchen zone at kid height, ideally a lower cabinet or drawer near the fridge. Stock it with reusable containers, snack bins, water bottles, and a thermos so everything is reachable in one stop. Add labels and drawer dividers so items stay in place. The goal is a lunch packing station kids can use without climbing or asking for help, which shortens the morning routine and builds independence.
What items should be included in a kid-friendly lunch station?
Start with bento-style boxes or compartment containers, a thermos for hot foods, a reusable water bottle, and snack bins for grab-and-go items. Add drawer dividers, labels, napkins, utensils, and a small bin for condiment storage. Keep a prep-ahead drawer with washed fruit and portioned snacks so packing takes minutes. Everything should sit at a height your child can reach safely.
How do you encourage kids to pack their own lunches?
Give them real choices inside limits. Set up the station with two or three healthy options per category, then let them pick one from each. Label bins with pictures for younger kids. A grab-and-go system means they assemble rather than search. Start with one day a week where they pack solo, then add days as confidence grows. Independence builds fastest when the setup makes the right choice the easy one.
How can a lunch station help streamline morning routines?
A lunch packing station removes the search step. When containers, snacks, and drinks live in one labeled zone, kids stop opening five cabinets and asking where things are. Prep-ahead items like cut fruit and portioned snacks cut assembly to a few minutes. Many families pack the night before and use the station only for adding cold items in the morning, which keeps the kitchen workflow calm.
Building a lunch packing station takes one afternoon, but the payoff is every school morning after that. The families who stick with it are the ones who set it up at kid height, label everything, and refill on a schedule. Viva homeStore carries the practical storage, containers, and organizers that make the system work in real kitchens, from small apartments to busy family homes. Shop now and turn lunch prep into a routine your kids can run themselves.