

Best Way to Maximize Narrow Pantry Storage in 2026
Table of Contents
- Why Narrow Pantries Waste More Space Than You Think
- Step 1: Empty and Sort With a Pantry Decluttering Checklist
- Step 2: Divide the Pantry Into Storage Zones
- Step 3: Install Vertical Storage and Adjustable Shelving
- Step 4: Choose the Best Organizers for Deep Narrow Pantry Spaces
- Step 5: Maximize the Door With Racks and Hooks
- Pantry Organization Ideas for Small Spaces That Actually Work
- Common Mistakes to Avoid in a Narrow Pantry
- Frequently Asked Questions
Last Updated: September 6, 2026
Why Narrow Pantries Waste More Space Than You Think
A narrow pantry is a paradox: it holds plenty of cubic feet, yet you can only comfortably reach the front six inches of each shelf. The core principle is simple: you must bring the back of the shelf to the front.
Most guides miss the real issue: when shelves are deep relative to the opening, items get buried, forgotten, and rebought.
The fix is a five-step process that addresses depth, height, and the door, so you can reclaim every inch of that cramped closet-style pantry.
Step 1: Empty and Sort With a Pantry Decluttering Checklist
Start completely empty. Pull everything out onto the kitchen counter or table, the only way to see what you own, what has expired, and what you will realistically use.
Sort into three clear zones: keep, donate, and toss. Check expiration dates on every package, and be honest about items bought for a recipe you will never make again. A common mistake is organizing around clutter; you are just neatly storing things you should discard.
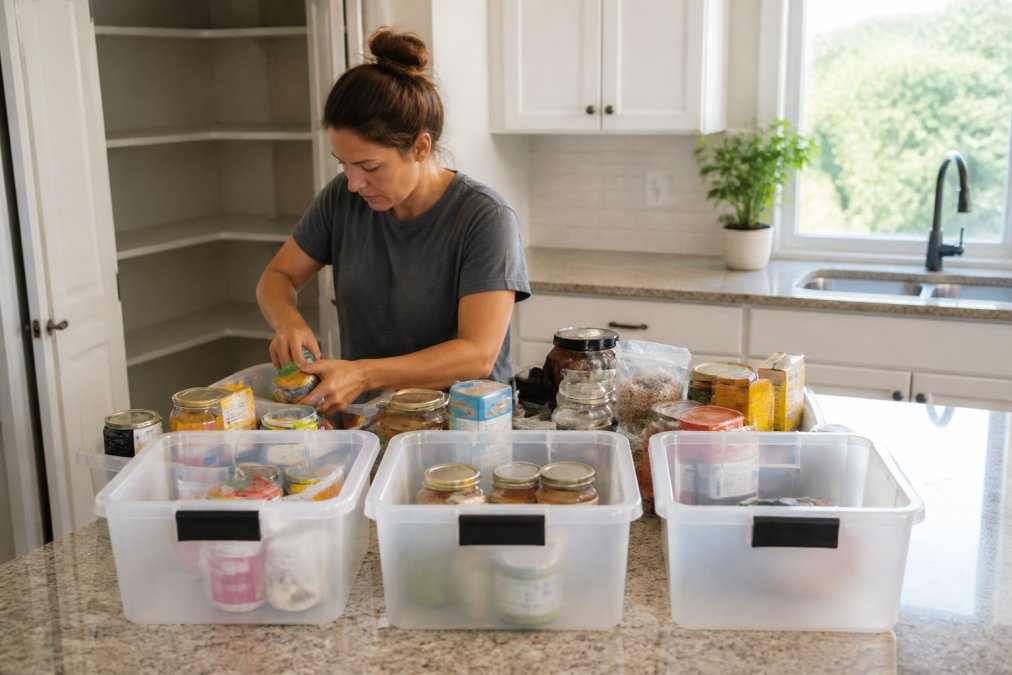
This step typically takes 20 to 30 minutes for a standard pantry. Wipe down the shelves while they are empty, and consider adding shelf liners to protect surfaces and reduce sliding.
Step 2: Divide the Pantry Into Storage Zones
Once everything is sorted, group items by category and assign each a dedicated zone to prevent chaos from returning.
Create zones for baking supplies, canned goods, dry goods like pasta and rice, snacks, and breakfast items. Position zones by frequency of use: daily items at eye level, heavy appliances or bulk supplies on lower shelves where they are safer to lift.
Consider accessibility for every household member. If someone has limited mobility or reach, place their most-used items between hip and shoulder height.
Step 3: Install Vertical Storage and Adjustable Shelving
Vertical storage is where narrow pantries win or lose. If shelves are fixed, measure the interior height and install adjustable shelving or shelf risers to double usable surface area.
Tension rods mounted vertically divide wide shelves into sections, preventing stacked bins from toppling. Use stackable shelf inserts to create a second level for shorter items like jars and spice containers.
Floor-to-ceiling shelving is the gold standard when structural integrity allows, using the full height often wasted. Before loading heavy items, verify weight capacity and confirm anchoring to wall studs, not just drywall.
Step 4: Choose the Best Organizers for Deep Narrow Pantry Spaces
The best organizers for deep narrow pantry spaces are pull-out drawers and clear, stackable bins, which solve the depth problem directly. The real differentiator is understanding your shelving's structural limits before committing to any product.
Weight Capacity: The Overlooked Failure Point
Most narrow pantry shelving is rated for 30 to 50 pounds per shelf when anchored to wall studs (homedepot.com). Wire shelving from brands like ClosetMaid or Rubbermaid typically supports 40 pounds per section, while particleboard or laminate shelves in older homes may hold far less. Check the manufacturer's weight rating stamped on the shelf frame or measure the shelf thickness, anything under 5/8 inch is likely not rated for heavy canned goods.
A gravity-fed can rack holding 12 standard 15-ounce cans adds 12 to 18 pounds before the rack itself. Stack two racks on one shelf and you approach the limit of a standard wire shelf. Distribute heavy items across lower shelves and use shelf risers only for lightweight dry goods.
Pull-Out Drawers: Mounting Matters
Pull-out drawers like the Rev-A-Shelf 5QR series or the Rubbermaid Pull-Out Cabinet Organizer mount to the cabinet floor or shelf surface, not the side walls, critical where side walls may be uneven or too thin for screws. Rev-A-Shelf models use a bottom-mount glide system rated for 75 to 100 pounds; the Rubbermaid version is lighter-duty at 30 pounds, better for spices, jars, and baking supplies.
Measure the interior width of your pantry, not the shelf width. Most pull-out drawers require 1/2 inch of clearance on each side for the glide mechanism, so a 12-inch-wide drawer needs a 13-inch opening. Also verify drawer depth: a 20-inch-deep drawer will not fit 18-inch shelves.
Clear Stackable Bins: The Visibility Trade-Off
Clear stackable bins like the mDesign or Sterilite ClearView lines work well for dry goods, but most are for lightweight items. Sterilite ClearView bins hold up to 10 pounds when stacked, dropping to 5 pounds per bin when stacked three high. Fine for pasta, rice, and cereal; not for jars of pasta sauce or olive oil.
For heavy items, use open wire baskets from a brand like Honey-Can-Do or simple clear bins without lids that sit side by side rather than stacked, preserving visibility without a collapse hazard.
Gravity-Fed Can Racks: Rotation Without Thinking
Gravity-fed can racks, such as the DecoBros 3-Tier Can Rack or the SimpleHouseware version, automatically rotate stock so older cans are used first. They work best on shelves at least 12 inches deep; on shallower shelves, the incline becomes too steep and cans can jam.
Install these racks on a lower shelf where weight is closest to the floor. For mobility-impaired users, a pull-out drawer with a front-facing can organizer is better because it eliminates reaching into the back of the shelf.
Lazy Susans: The Corner Solution
Lazy Susans and turntables work well for corner shelves and rotating items like oils and condiments. Check the turntable diameter versus shelf depth: a 10-inch turntable on a 12-inch shelf wastes a 1-inch gap on each side. For narrow pantries, consider a half-moon or kidney-shaped turntable that fits flush against the side wall.
The Structural Integrity Checklist
Before loading any organizer, run this quick checklist:
- Confirm the shelf is anchored to wall studs, not just drywall. Use a stud finder to locate studs behind the shelf brackets.
- Check the manufacturer's weight rating for both the shelf and the organizer. If either is unrated, assume a conservative 25-pound limit.
- Distribute heavy items on lower shelves, never above shoulder height.
- For pull-out drawers, verify the glide mechanism is rated for the intended load. A 30-pound drawer will fail under 50 pounds of canned goods.
- Avoid stacking clear bins more than three high unless the manufacturer explicitly states a higher stacking limit.
| Organizer Type | Best Use Case | Key Benefit | Weight Rating | Mounting Requirement |
|---|---|---|---|---|
| Pull-out drawers (Rev-A-Shelf) | Deep shelves, canned goods | Brings back items to the front | 75-100 lbs | Bottom-mount to shelf or cabinet floor |
| Pull-out drawers (Rubbermaid) | Spices, jars, baking supplies | Lightweight gliding access | 30 lbs | Bottom-mount to shelf |
| Clear stackable bins | Dry goods, snacks | Visible inventory, uniform stacking | 5-10 lbs per bin when stacked | None, free-standing |
| Lazy Susan turntables | Corners, oils, condiments | 360-degree access | Varies by model | None, free-standing |
| Gravity-fed can racks | Canned goods | Automatic stock rotation | 12-18 lbs loaded | None, free-standing on shelf |
This structural approach separates a pantry that works for years from one that collapses under a single bulk purchase.
Step 5: Maximize the Door With Racks and Hooks
The back of the pantry door is prime real estate that most households ignore. Door-mounted organizers add capacity without consuming shelf depth, but the door is also the most structurally constrained surface, it swings, has a frame, and is not designed for heavy loads.
Clearance Is the First Constraint
Before buying any over-the-door rack, measure the gap between the closed door and the front edge of your shelves. Most standard pantry doors have a 1-inch to 1.5-inch clearance when closed; a rack with 2-inch-deep baskets will not fit. Door clearance is a separate measurement from the NKBA's recommended 16 inches of clear floor space.
To measure correctly: close the door, then measure from its inside face to the front edge of the nearest shelf. Compare this against the product's "overall depth" or "basket depth." A rack 1.75 inches deep needs at least 2 inches of clearance to close without scraping.
Over-the-Door Rack Types and Weight Limits
There are two main mounting systems: hook-over and adhesive. Hook-over racks, like the SimpleHouseware Over Door Organizer, hang on the top edge and typically hold 20 to 30 pounds total, distributing weight across the door's top edge. However, they add 1.5 to 2 inches of thickness, which can interfere with the door frame if the opening is tight.
Adhesive-mounted racks, such as those using Command Adhesive Hooks, are damage-free but have a much lower weight limit, 5 to 7.5 pounds per hook. They work for measuring cups, aprons, or reusable shopping bags, but not for canned goods or glass jars; the adhesive fails over time under sustained load, especially in warm, humid environments.
The Door Frame Interference Problem
A common failure is a rack whose depth exceeds the clearance between the door and frame, preventing full closure. Choose a slim-profile rack with baskets 1 inch deep or less, or mount the rack on the side wall instead. Wall-mounted racks, like the Seville Classics Wall Mount Spice Rack, use the same vertical space without the clearance problem.
What to Store on the Door
Door-mounted storage is best for lightweight, frequently used items: spices, small jars, snack packs, foil, parchment paper, and cleaning supplies. Heavy items should never go on the door, the weight stresses hinges over time and can cause sagging. A standard pantry door with two hinges is rated for about 50 pounds total, including the door itself (build.com).
The Mobility-Impaired Angle
For mobility-impaired users, door-mounted storage brings items into the line of sight without requiring a deep reach. Mount most-used items at hip-to-shoulder height, use clear, labeled baskets, and avoid the bottom third of the door, which requires bending.
Installation Checklist
- Measure the door-to-shelf clearance with the door closed.
- Verify the door's total weight capacity, check the hinge rating or the door manufacturer's spec.
- Choose hook-over racks for loads up to 30 pounds; use adhesive hooks only for items under 5 pounds.
- Test the door swing after installation to confirm the rack does not hit the frame or shelves.
- Distribute weight evenly across the door, do not load one side heavily.
Door storage is not for heavy items; it keeps daily-use items within arm's reach, freeing shelf space for bulk goods that need structural support.
Pantry Organization Ideas for Small Spaces That Actually Work
The best pantry organization ideas for small spaces focus on modular storage and inventory management. Buy containers that stack uniformly and decant dry goods into clear containers to eliminate bulky packaging.
Implement a first-in, first-out rotation strategy: place new groceries behind existing stock to reduce food waste. A small dry-erase list on the door can track staples you are running low on.
Under-shelf baskets add a sliding drawer beneath existing shelves for lightweight items like foil and parchment paper. For a deep pantry, consider a closet-style system with heavy-duty wire baskets that pull out fully.
Common Mistakes to Avoid in a Narrow Pantry
The most common mistake is buying decorative baskets that hide contents. If you cannot see what is inside, you will forget it exists. Choose clear containers or label every opaque basket.
Another frequent error is ignoring weight capacity. Stacking heavy cans on flimsy plastic risers leads to collapse. Always check the weight rating of shelving inserts and racks before loading them.
Failing to adjust shelf height after reorganizing is also common. Shelves spaced for cereal boxes waste vertical space above shorter items. Reconfigure your pantry layout seasonally as cooking habits change.
The National Kitchen and Bath Association's pantry design guidelines recommend leaving at least 16 inches of clear floor space for comfortable access, which is worth checking before you commit to floor-mounted storage solutions.
For more ideas on compact living, our guide to organizing small studio apartments covers similar principles applied to entire rooms.
Frequently Asked Questions
How do you organize a very narrow pantry?
Start by emptying everything and decluttering with a checklist. Then divide the pantry into zones based on how often you use items. Install adjustable shelving to use vertical space, and add door-mounted racks for extra capacity. Use clear containers and pull-out drawers so items in the back stay visible and reachable. Focus on depth and height rather than width to make the most of a narrow footprint.
What is the best way to store items in a deep narrow pantry?
The best way to store items in a deep narrow pantry is to use pull-out drawers or sliding baskets. These bring back-row items to the front so nothing gets lost. Pair them with clear, stackable containers and lazy susans for corners. Label everything clearly and group similar items together. This approach turns wasted depth into functional space and simplifies meal prep.
How can I maximize storage space in a narrow pantry?
Maximize narrow pantry storage by using every inch of vertical space with floor-to-ceiling shelving or stackable shelf inserts. Install under-shelf baskets to add a second layer for small items. Use the back of the door for spices, snacks, or cleaning supplies. Choose modular, clear containers that stack neatly, and consider can organizers that rotate stock automatically to prevent expired goods.
What are common narrow pantry layout mistakes?
Common mistakes include leaving deep shelves without pull-out access, which hides items in the back. Another error is ignoring the door, wasting valuable hanging space. Overcrowding shelves without clear zones makes finding items harder. Finally, buying containers without measuring shelf depth first often leads to wasted space. Measure carefully, add lighting for visibility, and keep frequently used items at eye level to avoid these issues.
Making the most of a narrow pantry is about solving the depth problem, not just tidying shelves. Work through the five steps, invest in pull-out drawers and clear containers, and use the door to add capacity. Viva homeStore offers a curated selection of storage accessories, lighting, and shelving solutions that bring this system together for a more functional, comfortable home. Get started with Viva homeStore and turn your narrow pantry into the most efficient corner of your kitchen.