

Small Entryway Ideas: Organize Without a Closet
Table of Contents
- Start With a Landing Zone: Your No-Closet Entryway Blueprint
- How to Organize a Small Entryway Without a Closet: Step-by-Step
- Best Entryway Furniture for Small Spaces: What to Buy
- Rental-Friendly and No-Drill Small Entryway Storage Ideas
- DIY Entryway Organization: Budget Projects That Look Built-In
- The Seasonal Rotation Workflow: Keep Your Entryway Clutter-Free
- Your Next Step: Build a System That Lasts
- Frequently Asked Questions
Last Updated: September 9, 2026
Start With a Landing Zone: Your No-Closet Entryway Blueprint
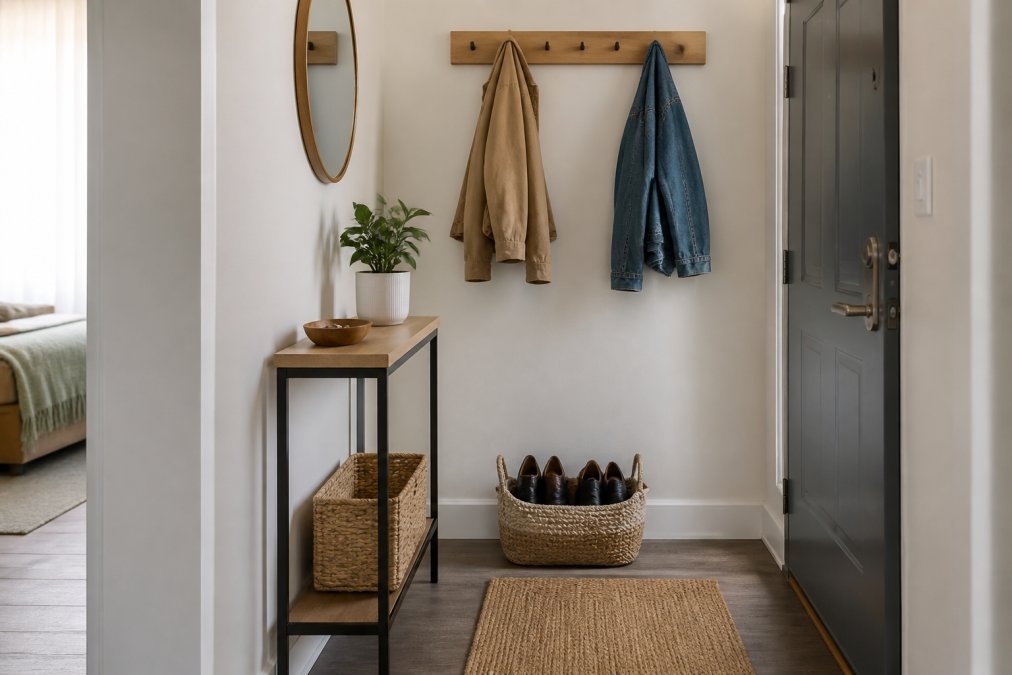
Organizing a small entryway without a closet starts with accepting one simple fact: you are not storing a wardrobe here, you are managing a transition point. The spaces that stay tidy are the ones with the clearest rules. The biggest difference between a chaotic entry and a calm one is a defined "landing zone" where daily items have a designated home.
The 4-Item Rule: What Actually Belongs in a Small Entryway
The most effective small entryway ideas follow what we call the 4-Item Rule. Restrict your landing zone to four categories: outerwear for the current season, the shoes you wear most often, daily carry items like keys and mail, and one catch-all container for anything that arrives with you. Everything else belongs elsewhere in the home.
This discipline separates a functional small entryway storage system from a dumping ground. When coats from three seasons, sports gear, and shopping bags accumulate, no amount of shelving will save you.
How to Organize a Small Entryway Without a Closet: Step-by-Step
Organizing a small entryway without a closet is more about sequencing than shopping. Establish what you use daily before buying a single basket or hook.
Step 1: Declutter and Define Your Daily Carry
Empty the entryway and sort everything into three piles: use daily, use weekly, and belongs elsewhere. Be honest about the third pile, last winter's hats and gloves belong in a seasonal bin, not on your hooks.
Step 2: Assign a Home for Every Category
Before installing anything, map out where each daily item will live: coats on hooks at shoulder height, shoes on a low rack or in a basket, keys and mail in a shallow tray near the door, umbrellas in a tall, narrow bin.
Step 3: Install the Right Wall Storage
Wall-mounted hooks are the backbone of any mudroom-less entryway. Install them at two heights if you share the space with children, and choose hooks with a deep curve so heavy bags do not slip off. Limit each hook to one or two items.
Step 4: Add a Seating and Shoe Solution
A storage bench gives you a place to sit while removing shoes, and the interior or under-seat space hides footwear. Pair it with a slim shoe rack that fits under the bench to solve the most common small entryway storage dilemma without extra floor space.
Best Entryway Furniture for Small Spaces: What to Buy
When selecting entryway furniture for small spaces, prioritize pieces that serve multiple functions. A narrow console table with drawers offers a landing surface for mail and keys while concealing smaller items. The best options combine open shelving for daily shoes with closed storage for less attractive items.
| Furniture Type | Best For | Key Feature to Look For | Space Impact |
|---|---|---|---|
| Storage bench | Seating + shoe hiding | Lift-up lid or open base | Medium footprint |
| Slim console | Keys, mail, decor | Drawers or lower shelf | Narrow depth |
| Wall-mounted hooks | Coats and bags | Deep curve, multi-height | Zero floor space |
| Vertical coat rack | Heavy daily wear | Multiple tiers | Small footprint |
Rental-Friendly and No-Drill Small Entryway Storage Ideas
Renters face a unique constraint: organizing a small entryway without a closet when you cannot mount anything permanently. The answer lies in tension rods, adhesive hooks, and over-the-door solutions. Adhesive hooks rated for 5 to 10 pounds handle coats and bags on most painted surfaces, and they remove cleanly with a bit of heat from a hair dryer.
Freestanding options also work well. A clothing rack on casters provides movable hanging storage that can roll into a closet when guests arrive. These no-drill approaches sacrifice some visual polish but deliver the same functional result.
DIY Entryway Organization: Budget Projects That Look Built-In
DIY entryway organization is not about saving money on everything, it is about spending your budget where it matters and building where it does not. Run every potential project through this filter: If the item must bear weight daily, hold up to moisture, or survive a move, buy it. If it is static, decorative, or easily replaced, build it.
Tier 1: Buy These (Do Not DIY)
- Shoe racks and benches that hold daily weight. A poorly joined bench is a safety hazard. A metal or solid-wood shoe rack from a big-box retailer will outlast anything you can build from pine for the same cost. The trade-off is structural integrity, not aesthetics.
- Adhesive hooks rated for 10+ pounds. These rely on proprietary adhesive chemistry; a homemade version will fail. Brands like Command offer strips rated up to 16 pounds per pair, and they remove cleanly without damaging paint.
- Tension rods. The internal spring mechanism is the product. Trying to rig a custom rod with dowels and rubber caps is a weekend of frustration for a result that is less adjustable.
Tier 2: Build These (Do Not Buy)
Project 1: The Floating Shelf Catch-All
A floating shelf above the door frame gives you a landing zone for rarely used items like spare keys, sunglasses, or a small plant, without eating into walking space. Buy a 36-inch solid pine board (about $12-$18), two 6-inch shelf brackets rated for 50 pounds (about $8-$12), and paint that matches your trim. Mount the brackets into wall studs using a stud finder; if you hit only drywall, use toggle bolts rated for 75 pounds (homedepot.com). The finished look can be achieved at a total cost of roughly $25-$35 and 45 minutes of labor.
Project 2: The Crate Shoe Cubby
For a narrow entryway, a single wooden wine crate (available for $5-$10 at craft stores or free from a local liquor store) tipped on its side creates a two-slot shoe cubby. Sand the edges, apply a coat of wood stain or paint, and stack two crates vertically if you need four slots. Secure stacked crates to each other with 1-inch L-brackets on the back corners, and anchor the bottom crate to the wall with a furniture anti-tip strap, a $5 safety device that is non-negotiable if children are in the home (cpsc.gov). This project costs under $20 and holds four pairs of daily shoes, but it will not survive heavy abuse.
Project 3: The Knob Plank Coat Rack
A 24-inch by 6-inch piece of pre-primed MDF board (about $8) plus four vintage or modern cabinet knobs ($2-$4 each) becomes a wall-mounted coat rack. Space the knobs 6 inches apart, centered vertically. Mount the plank to the wall with two 2.5-inch screws into studs, critical because a coat rack loaded with three winter jackets can pull 30-40 pounds of force. The total cost is $16-$24. The trade-off: MDF will not hold up to moisture, so keep it away from direct rain splash.
The Consistency Trick That Makes DIY Look Expensive
The single biggest visual tell of a DIY project is mismatched finishes. Paint every wood project the same color, either your wall color for a built-in look or a single accent color like matte black for a deliberate design statement. Use the same brand and sheen (satin is the most forgiving for hiding fingerprints). When all three projects above share a finish, the entryway reads as a coordinated system.
When to Skip DIY Entirely
If you are renting and cannot drill into walls, or if you lack a stud finder and a level, DIY is the wrong move, the no-drill alternatives above will serve you better. DIY is also the wrong choice for anything that must support more than 50 pounds, such as a person sitting. A storage bench is a buy item, not a build item, unless you have advanced joinery skills (cpsc.gov).
The Seasonal Rotation Workflow: Keep Your Entryway Clutter-Free
A clutter-free entryway depends on a seasonal rotation workflow that most people skip entirely. Twice a year, at the start of spring and fall, swap out the contents of your landing zone. Heavy winter coats move to a hall closet or storage bin, replaced by lighter jackets. This prevents the accumulation of off-season items that slowly strangles a small space.
Set a recurring calendar reminder for the first weekend of April and October. The swap takes about twenty minutes: remove everything, wipe down the surfaces and baskets, and return only the items appropriate for the coming season.
Your Next Step: Build a System That Lasts
Most entryway organization systems fail within three weeks not because of poor storage but poor habit design. The entryway is a "transition point," a moment when your brain is focused on departure or arrival, not tidiness. If the system requires more than two steps to put something away, it will not survive a rushed Monday morning.
The 2-Step Rule for Habit Formation
Every item in your entryway must be storable in two steps or fewer: walk in the door, then drop the item in its designated home. If you have to open a lid, slide a bin out from under a bench, or untangle a hook, you have added friction, and the item will end up on the floor. Audit your current setup against this rule:
- Keys: Step one is dropping them into a wall-mounted dish or tray. If the dish is behind a door that must be closed first, it fails.
- Coat: Step one is hanging it on a hook. If the hook is behind a piece of furniture or requires reaching over a bench, it fails.
- Shoes: Step one is kicking them into an open bin or onto a low rack. If the rack is under a bench lid that must be lifted, it fails for daily use, reserve lidded storage for guest shoes or off-season items.
The 30-Second Reset: A Daily Closing Ritual
The most effective habit for a closet-less entryway is not a weekly deep clean, it is a 30-second reset performed every evening. Set a phone alarm for 8:00 PM or tie the reset to an existing habit like brushing your teeth. The reset has exactly three actions: (1) sweep any loose items into the catch-all bin, (2) hang any coats draped over furniture, (3) align shoes so the toes face the door. The key is that the reset is a fixed routine, not a response to visible mess.
The "One In, One Out" Rule for the Drop Zone
The drop zone has a finite capacity, and it will fill to overflow unless you enforce a boundary. Adopt the one-in-one-out rule: every time a new item enters the entryway, a new pair of daily shoes, a new jacket, a new bag, one old item must leave. This is not a decluttering purge; it is a maintenance habit that prevents the slow accumulation that kills most systems.
Why Visual Cues Beat Willpower
Your brain responds to visual triggers more reliably than to abstract rules:
- Place a shallow dish or tray directly on the surface where you drop your keys. The dish is a visual anchor that says "keys live here." Without it, the keys land anywhere.
- Use a single catch-all bin with a lid or a solid color. An open bin invites random dumping; a closed bin forces a decision about what goes inside. If you find yourself tossing mail into it, add a separate mail tray on the wall above it.
- Leave one empty hook. A completely full rack signals that there is no room, and items will pile on the floor. One empty hook is a visual cue that there is space and that the system is not at capacity.
The 90-Day Habit Audit
Set a calendar reminder for 90 days from today. On that day, spend 10 minutes observing your entryway at the end of a normal day. Ask three questions: (1) What items are consistently not in their designated home? (2) Which storage solution is being bypassed? (3) What would make the correct behavior easier? The answer to the third question is your next purchase or adjustment. This audit turns organization into an adaptive system that evolves with your habits.
Building a system that lasts is not about buying the perfect bench or the ideal hook arrangement, it is about designing for the psychological reality of a transition point. The 4-Item Rule sets the boundary, the storage solutions provide the homes, and the 2-Step Rule plus the 30-second reset make the behavior automatic. Start with one change today: pick the single item that most often ends up on the floor and create a two-step home for it.
Frequently Asked Questions
What can I use instead of a closet for coats and shoes?
Use a wall-mounted coat rack or a row of sturdy hooks placed at different heights for coats and bags. For shoes, a slim shoe rack or a bench with built-in storage keeps pairs off the floor. Add a tall, narrow cabinet if you have floor space. These small entryway ideas replace closet function without requiring structural changes.
How do you organize a narrow entryway without making it look cluttered?
Limit visible items to your daily essentials: one jacket per hook, one pair of shoes per person. Store seasonal items elsewhere and rotate them. Choose open storage like baskets and bins to hide clutter while keeping things accessible. A vertical layout using wall space keeps the floor clear and makes the space feel larger.
What is a good entryway organizer for a small apartment?
A wall-mounted organizer with hooks and a small shelf handles keys, mail, and bags without taking floor space. Pair it with an over-the-door shoe organizer if your door allows. For a no-drill option, use adhesive hooks rated for your wall type. These organizers create a functional drop zone in even the smallest apartment entry.
What are the best vertical storage solutions for small entryways?
Floor-to-ceiling shelving units or tall, narrow bookcases maximize vertical space. Install a wall-mounted rail system with hooks and baskets that can be rearranged. Use the back of the entry door for hanging organizers. Vertical storage keeps everyday items within reach while freeing up valuable floor space.