

Space Saving Solutions for Tiny Kitchen Pantries
Table of Contents
- Why Tiny Pantries Feel Smaller Than They Are
- Start with a Full Pantry Audit and Declutter
- Vertical Storage for Kitchen Pantries: Use the Full Height
- Best Pantry Organizers for Small Spaces That Earn Their Spot
- Small Pantry Organization Ideas That Cost Under $30
- Rental-Friendly and No-Drill Options for Your Pantry
- Final Checklist: Your Space Saving Pantry Action Plan
- Frequently Asked Questions
Last Updated: September 8, 2026
Tiny kitchen pantries present a unique challenge: you need to store more food and gear than the physical space seems to allow. Space saving solutions for tiny kitchen pantries are not about squeezing everything into a smaller footprint, but about rethinking how you use the volume you already have, from the back of the door to the top shelf. This guide from Viva homeStore walks through the most effective strategies.
The biggest mistake most people make is buying organizers before they declutter. You cannot organize clutter; you can only reorganize it.
Why Tiny Pantries Feel Smaller Than They Are
The feeling of a cramped pantry often has less to do with the square footage and more to do with how the space is used. Most pantries suffer from "dead space": the vertical gaps between items and shelves, and the deep, dark zones at the back of a shelf where items get lost for months.
Another culprit is the lack of a system. When similar items are scattered across different shelves, you waste time searching and buy duplicates. The perception of "no space" usually means "no structure." Fixing this starts by looking at the pantry layout as a series of zones that can be stacked, hung, and pulled out.
Start with a Full Pantry Audit and Declutter
Before you buy a single container, empty the entire pantry onto the counter. Group items by category: canned goods, pasta and grains, baking supplies, snacks, and spices. As you sort, check expiration dates and be honest about items you bought for a recipe once and will never use again.
Keep a "maybe" box for items you are unsure about and donate or discard the rest. Once you have reduced the volume, measure your shelves, including the height between them and the depth from front to back. This prevents you from buying organizers that do not fit.
Vertical Storage for Kitchen Pantries: Use the Full Height
Vertical storage for kitchen pantries is the single highest-impact change you can make. Add tiered racks or risers to see and reach items in the back row without pulling everything out. For shelves that are too tall, stackable units or wire shelves can double or triple your usable surface area.
The wall space inside the pantry is also prime real estate. Mounting a small shelf or rail system on an interior wall can hold spices, oils, or frequently used jars. For items stored high up, keep a small step stool nearby. Think in three dimensions: front to back, bottom to top, and wall to door.
Best Pantry Organizers for Small Spaces That Earn Their Spot
When choosing organizers, prioritize function over aesthetics. The best pantry organizers for small spaces solve a specific problem, like accessing the back of a shelf. Ask whether the organizer increases your usable space or just adds another layer of clutter.
Stackable Containers and Modular Bins
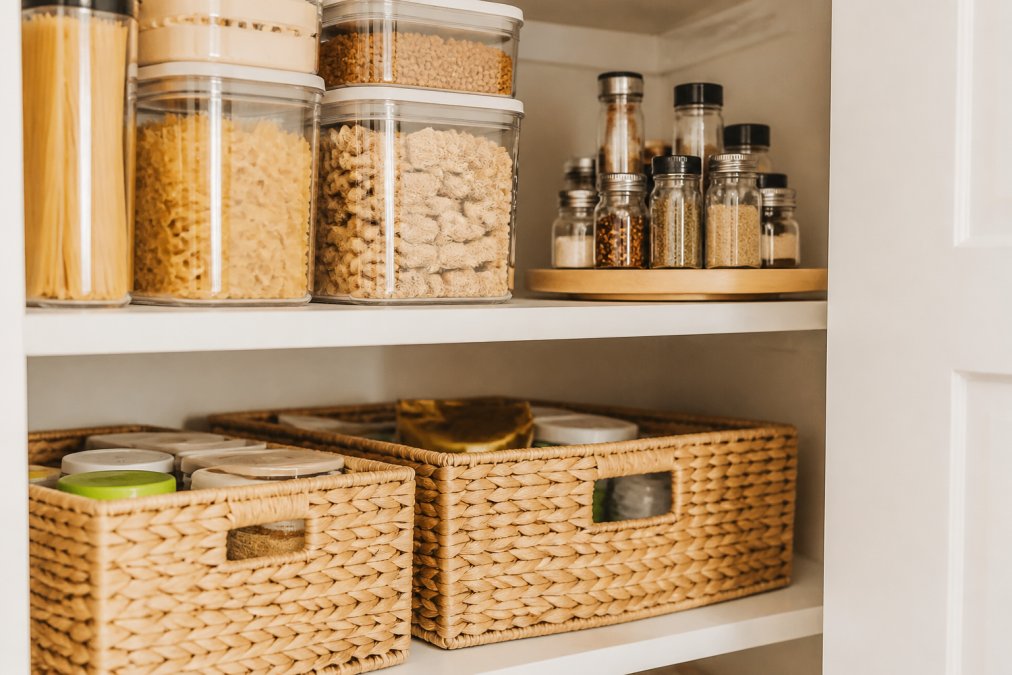
The foundation of a tidy pantry is a uniform container system. Clear, stackable containers for dry goods like flour, sugar, and pasta make it easy to see when you are running low. Modular bins with integrated handles act like drawers on open shelves, ideal for grouping loose items like single-serve packets or spice sachets.
Lazy Susans and Door-Mounted Racks
For deep shelves and corner cabinets, a lazy susan brings items at the back to the front with a simple spin. Door-mounted racks turn the inside of the pantry door into a slim storage area for spices, jars, or cutting boards.
Small Pantry Organization Ideas That Cost Under $30
You do not need a professional organizer or a full remodel to make a significant difference. Adhesive hooks can be stuck to the inside of the door to hang measuring cups, aprons, or reusable grocery bags. Tension rods can be installed between two walls to create a vertical divider for cutting boards or baking sheets.
Clear, stackable can organizers hold cans in a single row and let you see the labels easily, preventing duplicates. Shelf dividers keep tall items like cereal boxes from falling over. Focus on small, targeted fixes that address your biggest pain points rather than overhauling everything at once.
Rental-Friendly and No-Drill Options for Your Pantry
Most pantry organization advice assumes you own your walls and can drill, screw, or permanently mount anything you want. If you rent, that advice is useless. This section covers a fully functional, damage-free pantry system built entirely on tension, adhesion, and gravity.
Tension Rods: The Load-Bearing Workhorse
Tension rods are not just for shower curtains. A 1/2-inch to 5/8-inch diameter rod, properly installed, can hold 10 to 15 pounds of evenly distributed weight (familyhandyman.com). Use them horizontally to create a shelf divider for cutting boards and baking sheets, or vertically to split a deep cabinet into two shallow zones. Check that the rod ends have rubber or silicone grips to avoid slipping.
Trade-off: Tension rods rely on friction, not fasteners. They can slip if overloaded or if the mounting surfaces are uneven. Test the rod by pressing firmly on the center after installation; if it moves, it will fail under load. For heavier items like cast iron or glass jars, skip the tension rod and use a freestanding shelf unit instead.
Adhesive Hooks and Strips: Know the Weight Limits
Adhesive hooks have improved dramatically. Command brand hooks, for example, rate their small hooks at 1 pound and their large hooks at 5 pounds. The bond is temperature-sensitive: in a warm, humid pantry, adhesive can soften; in a cold garage pantry, it can become brittle. Clean the surface with rubbing alcohol, wait 24 hours before hanging anything, and never exceed 75% of the rated weight.
Trade-off: Adhesive strips fail on textured walls, wallpaper, or surfaces above 90°F. They also leave a sticky residue if removed incorrectly, always pull the strip straight down, not outward, to release the adhesive cleanly.
Over-the-Door Organizers: The Hidden Vertical Zone
The back of a pantry door is a full vertical plane that most renters ignore. Over-the-door organizers that hook over the top edge can hold 20 to 30 pounds of spices, snacks, or cleaning supplies. Look for models with adjustable hooks that fit doors between 1-3/8 and 1-3/4 inches thick.
Trade-off: These organizers add stress to the door hinges over time. On hollow-core interior doors, heavy loads can cause the door to sag (build.com). Keep the load under 20 pounds and distribute items evenly. Also, measure the gap between the door and the frame, a thick organizer can prevent the door from closing fully.
Freestanding and Stackable Systems: No Installation Required
For renters who want maximum storage without any wall contact, modular freestanding shelving units, like wire utility carts or stackable plastic drawer towers, can sit inside a pantry or beside it. Inside cabinets, use stackable wire shelves that rest on existing shelf surfaces to double your usable height. The trade-off is stability: tall, narrow units can tip if overloaded on top, so keep heavy items on the bottom shelves.
The Rental-Friendly Action Plan
- Measure your door gap, if it is under 2 inches, skip the over-door organizer and use adhesive hooks on the interior door face instead.
- Install tension rods first, they give you the most vertical storage for kitchen pantries with zero damage.
- Use adhesive strips for lightweight categories, spice jars, measuring spoons, and foil boxes stay under the 5-pound limit.
- Keep a damage-repair kit, spackle, touch-up paint, and a putty knife. Even careful renters occasionally need to patch a hole from a previous tenant's failed DIY project.
By choosing tension, adhesion, and gravity over drills and screws, you can build a system that is fully reversible, fully portable, and fully functional, and you can take it with you when you move.
Final Checklist: Your Space Saving Pantry Action Plan
Transforming a tiny pantry is not a one-time event, it is a system you maintain. The checklist below integrates two angles the top-ranking articles ignore: ergonomic accessibility for all users and an inventory management loop that prevents over-buying.
Step 1: Audit with Accessibility in Mind
Empty the pantry and sort items into zones based on who uses them and how often. Do not just group by category, group by reach. Items used daily (coffee, cereal, cooking oil) belong between hip and shoulder height. Items used weekly (pasta, canned vegetables) belong at waist to knee level. Items used monthly or seasonally belong on the top shelf or the floor. This zoning is critical for elderly users or anyone with mobility limitations.
Action: Place a small step stool with a handrail inside or beside the pantry. Never store heavy items above shoulder height, a falling 5-pound bag of flour is a serious injury risk.
Step 2: Purge and Measure
Remove everything, discard expired items, and donate duplicates. Then measure the reach depth, how far you can comfortably extend your arm into a shelf. For most adults, that is 16 to 20 inches (the CDC). Anything stored beyond that depth will be forgotten. If your shelves are deeper than 20 inches, add pull-out bins or lazy susans to bring the back row forward.
Step 3: Install Vertical and Door Storage
Add risers, stackable shelves, and tension rods to use the full height. Install over-door organizers or adhesive hooks on the door. Place the most-used items at the front edge of each shelf, not the back. Use clear, labeled containers so you can identify contents without pulling everything out.
Step 4: Set Up an Inventory Management System
A tiny pantry fails not because you lack space, but because you buy duplicates of items you already own but cannot see. Implement a simple tracking system, no app required.
The Whiteboard Method: Mount a small dry-erase board on the inside of the pantry door. List the staples you use weekly: flour, sugar, rice, pasta, canned tomatoes, coffee, olive oil. When you open a new container, add a tally mark. When you use the last of an item, circle it. Before you go grocery shopping, photograph the board and check it against your shopping list. This prevents buying a third jar of paprika when you already have two hidden behind the canned beans.
The First-In-First-Out Rule: When you buy new canned goods or dry goods, place them behind the older items. This rotation system ensures you use what you have before it expires, reducing waste and freeing space.
The Par Level Method: Assign a minimum quantity for each staple. For example, keep at least two cans of diced tomatoes and one box of pasta on hand. When you use the last one, it goes on the shopping list immediately. This prevents both over-stocking and emergency runs to the store.
Step 5: Assign a Home for Every Category
Use modular bins and lazy susans to group items. Label each bin with its category, snacks, baking, breakfast, canned goods. The label should face forward so you can read it at a glance without pulling the bin out. For ergonomic access, store the heaviest bins at waist height and the lightest on the top shelf.
Step 6: Schedule a Monthly Reset
Tiny pantries drift back to chaos within weeks. Schedule a 15-minute reset on the first of each month: pull everything forward, wipe down shelves, check for expired items, and confirm your inventory board is accurate.
The Complete Checklist
| Step | Action | Ergonomic Focus | Inventory Focus | Time Estimate |
|---|---|---|---|---|
| 1 | Empty and sort by reach frequency | Place daily items at hip-to-shoulder height | Note what you already own | 30-45 minutes |
| 2 | Purge expired items and measure reach depth | Discard items you cannot comfortably reach | Remove duplicates from inventory | 15-30 minutes |
| 3 | Install vertical, door, and pull-out storage | Keep heavy items below shoulder height | Label containers for visibility | 30-60 minutes |
| 4 | Set up inventory board and par levels | Place the board at eye level | List staples and set minimum quantities | 15 minutes |
| 5 | Assign a labeled home for every category | Store heavy bins at waist height | Update board with new purchases | 20-30 minutes |
| 6 | Schedule a monthly 15-minute reset | Test that all items remain reachable | Rotate stock and update par levels | 15 minutes monthly |
Reclaiming your tiny pantry is not about buying more containers. It is about building a system that respects your physical limits, tracks what you own, and makes every item visible and reachable. Start with the audit, set up your inventory board, and commit to the monthly reset.
Frequently Asked Questions
How do I maximize space in a small pantry?
Start by decluttering and removing expired items. Then, focus on vertical storage for kitchen pantries by adding risers or stackable shelves. Use clear, stackable containers for dry goods and install door-mounted racks for spices and small jars. Group similar items in bins so you can see everything at a glance and avoid buying duplicates.
What are the best pantry organizers for small spaces?
The most effective organizers are stackable containers, lazy susans for corners, under-shelf baskets, and door-mounted racks. These items use vertical space and make items accessible. Look for modular systems that can adapt to your shelf sizes. For a budget-friendly start, clear bins and adhesive hooks deliver significant organization for a low cost.
How do I organize a pantry with no shelves?
If you have a closet or a space without shelves, create a storage solution using freestanding shelving units or heavy-duty wire racks. Tension rods can be used to create hanging space for spray bottles. Consider a rolling cart for extra prep space and storage. These options add structure without requiring permanent installation.
How can I make a small pantry look bigger and more organized?
Use clear containers to create a uniform look and instantly reduce visual clutter. Install lighting if possible to brighten dark corners. Maintaining a clean, uncluttered layout makes the space feel more open and efficient.