

Affordable Kitchen Cabinet Storage Hacks for Renters
Table of Contents
- Why Renters Need Damage-Free Cabinet Storage
- No-Drill Kitchen Storage Solutions That Protect Your Deposit
- Tension Rod Storage Hacks for Instant Vertical Space
- Small Kitchen Cabinet Hacks Under $20
- Weight Capacity and Safety for Renters
- Removal and Cleaning Tips for Your Security Deposit
- Conclusion
- Frequently Asked Questions
Last Updated: September 18, 2026
Why Renters Need Damage-Free Cabinet Storage
Renters face a storage problem homeowners don't: every improvement has to be reversible. A nailed-in shelf or screwed-on rack can cost you part of your deposit, and many leases ban permanent alterations outright. This guide from Viva homeStore covers affordable kitchen cabinet storage hacks for renters that add capacity without touching walls, doors, or cabinet frames.
No-Drill Kitchen Storage Solutions That Protect Your Deposit
No-drill kitchen storage solutions rely on three mounting methods: adhesive, tension, and over-the-door hooks. Each leaves no holes or residue when removed correctly, which is why they suit rentals. Choose based on what you're storing and how much weight the surface can take.
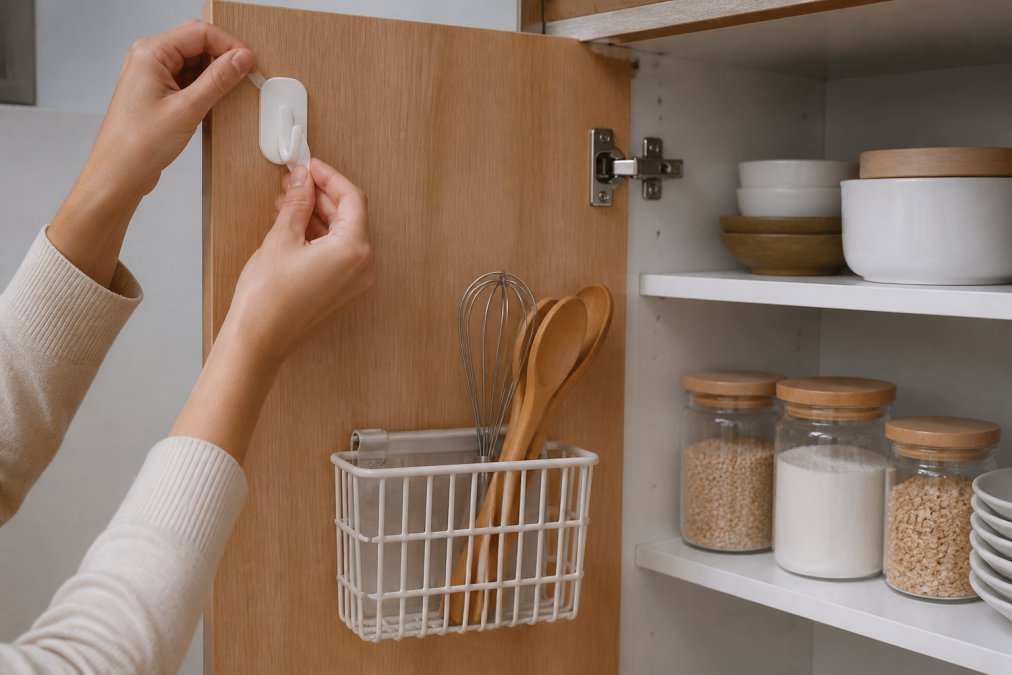
Adhesive Hooks and Damage-Free Mounting
Damage-free adhesive hooks are the fastest way to add storage inside a cabinet door. Command hooks use a stretch-release adhesive that pulls off cleanly at move-out. Stick to lightweight items: measuring spoons, small utensils, a dish towel.
Over-the-Door and Tension-Mounted Options
Over-the-door organizers hang on the existing hinge or slide over the door edge, so nothing sticks to the finish. Tension rods wedge between two cabinet walls and create instant hanging space for spray bottles or cleaning supplies. Both are temporary by design, exactly what a rental needs.
Tension Rod Storage Hacks for Instant Vertical Space
Tension rod storage hacks turn one shelf into two by suspending a rod between cabinet walls and hanging spray bottles, cleaning brushes, or small baskets from it. No hardware, no adhesive, and removal takes seconds.
Here's how to set one up:
- Measure the interior width of the cabinet at the point where you want the rod.
- Choose a tension rod rated for that width plus a small buffer.
- Twist to extend the rod until it presses firmly against both walls.
- Test the hold with a light tug before hanging anything.
- Hang lightweight items only, and keep the load balanced.
Small Kitchen Cabinet Hacks Under $20
Small kitchen cabinet hacks under $20 deliver the biggest return when you target dead space first. Shelf risers, stackable bins, and turntables cost little, install in seconds, and move with you.
| Solution | Typical Price | Best For | Removal Effort |
|---|---|---|---|
| Wire shelf riser | About $8 | Plates, bowls, canned goods | Lift out |
| Stackable bin | About $8 | Snacks, small pantry items | Lift out |
| Lazy susan turntable | About $15 | Corner cabinets, spices | Lift out |
| Adjustable pan organizer | About $16 | Pans, lids, cutting boards | Lift out |
| Cabinet door organizer | About $20 | Spices, cleaning supplies | Unhook |
Shelf Risers and Stacking Solutions
Shelf risers and stacking solutions double your usable shelf height without installation. A wire riser sits on your existing shelf and creates a second level for plates or cans; a sturdier stackable frame does the same.
Turntables and Lazy Susans
Turntables and lazy susans solve the corner cabinet problem. A lazy susan turntable rotates a full 360 degrees, so items at the back come to you instead of getting lost. Raised edges stop spills during rotation.
Weight Capacity and Safety for Renters
Weight capacity is the factor most renters ignore until something falls. Adhesive hooks hold a fixed maximum, tension rods hold less than they look like they should, and overloading either risks damage to the cabinet or your belongings. Check the rated limit on the packaging and stay under it.
| Mounting Method | Typical Working Load | Best For | Failure Mode |
|---|---|---|---|
| Adhesive hook (small strip) | Up to about 1 lb | Measuring spoons, a dish towel, light utensils | Strip releases, hook drops straight down |
| Adhesive hook (large strip) | Up to about 5 lb | Small baskets, spice jars, cleaning brushes | Strip peels from the wall, sometimes taking paint |
| Over-the-door hook or rack | Up to about 10 lb | Cutting boards, pot lids, wrap boxes | Door hinge strain, door rubs the frame |
| Tension rod | Up to about 5 lb evenly distributed | Spray bottles, small baskets, scrubbers | Rod slips sideways and drops the whole load |
| Freestanding riser or rack | 15-30 lb depending on frame | Cans, plates, pans, small appliances | Frame bows or tips forward |
- Halve the rating for anything you hang on a door. A swinging door multiplies the load every time it opens and closes.
- Keep the load centered on tension rods. Weight on one end levers the rod out of place; weight in the middle keeps both ends pressed against the cabinet walls.
- Never stack glass above shoulder height. If a riser tips, glass is what breaks and what cuts.
- Skip adhesive entirely for cast iron, stand mixers, or full stockpots. Those belong on a freestanding rack that rests on the cabinet floor.
Tipping and Earthquake Safety on Top of Cabinets
- Store only lightweight, low-value, infrequently used items: paper goods, extra linens, empty containers.
- Keep the stack below the ceiling line so nothing can slide off the front edge.
- Push items back against the wall rather than forward toward the cabinet face.
- Use a step stool rated for your weight instead of a chair, and never reach over your head while standing on a wet floor.
- Skip glass, ceramics, and anything heavy. If it would hurt to drop on your foot, it does not belong up there.
If you are storing heavy cookware, choose a freestanding rack. Both rest on the cabinet floor and put no stress on walls or doors. Freestanding is the only category that cannot damage the unit through mounting failure, because there is no mounting.
Removal and Cleaning Tips for Your Security Deposit
Removal and cleaning decide whether you get your full deposit back. Every damage-free product in this guide comes off with the right technique, and a clean cabinet interior is easy to restore, but most renters remove adhesive hooks the wrong way, and that is where deposits get eaten.
How to Remove Adhesive Hooks Without Stripping Paint
The stretch-release strip is designed to be pulled, not pried. Here is the sequence:
- Hold the hook firmly against the surface with one hand so it does not snap back.
- Grasp the tab at the bottom of the strip and pull it straight down along the wall, parallel to the surface, not outward, not at an angle.
- Pull slowly and steadily. The strip should stretch to several times its original length before releasing. If it resists, you are pulling too fast or at the wrong angle.
- Once the strip releases, the hook comes free with no residue. If a thin film remains, roll it off with your thumb rather than scraping.
What not to do:
- Do not pull outward. That is what tears paint and drywall paper.
- Do not use a knife, scraper, or putty knife. A gouge in the cabinet finish is far harder to explain than a clean removal.
- Do not heat the strip with a hair dryer unless the manufacturer says to. Heat can soften the finish underneath.
- Do not remove a hook that has been holding weight for years without testing a corner first. Old adhesive can be more brittle than fresh adhesive.
Surface-by-Surface Removal Cautions
Not every cabinet surface tolerates the same removal method:
- Painted wood or MDF: The most fragile. Pull strips slowly and at a shallow angle. Expect some risk of paint lift on older or poorly bonded paint.
- Laminate and melamine: Generally forgiving. Adhesive releases cleanly, but residue can smear; wipe with warm soapy water.
- Real wood with oil finish: Adhesive can leave a dull spot. Wipe with a wood-safe cleaner, not alcohol.
- Glass cabinet doors: Adhesive releases easily, but never use a razor blade. A scratch in glass is permanent.
- Inside cabinet walls: Usually the safest surface in the whole kitchen. This is why interior-door mounting is the renter's best friend.
Cleaning the Cabinet Interior Before Move-Out
Once the hardware is out, the interior needs a real clean, not a wipe. Kitchen cabinets collect a grease film that traps dust and crumbs, and a landlord inspecting an empty cabinet will notice.
- Remove all adhesive hooks by pulling the tab straight down, slowly, not outward.
- Wipe any adhesive residue with warm soapy water, then dry. For stubborn residue, a small amount of rubbing alcohol on a cloth works on laminate but not on oiled wood.
- Take out tension rods and shelf risers, then vacuum crumbs from shelf corners with a crevice tool.
- Wipe cabinet interiors with a mild degreaser to remove the grease film, then wipe again with clean water.
- Wipe the door faces and edges, including the top edge where grease accumulates.
- Check door hinges and frames for scuffs before your final walkthrough.
- Leave the doors open for an hour so the interiors dry fully. Trapped moisture smells.
What Counts as Normal Wear vs. Damage
Know this before your walkthrough. Most leases and state landlord-tenant rules treat minor scuffs, small nail holes, and faded paint as normal wear that cannot be charged against a deposit. Gouges, large holes, broken hardware, and stubborn stains are typically chargeable. Adhesive residue that cleans up is normal wear; adhesive that pulled off paint is a gray area, document it and ask.
Conclusion
Renting shouldn't mean cramped cabinets. Damage-free storage is the difference between a kitchen that works and one you fight with every morning.
Frequently Asked Questions
What are some renter-friendly storage options for a kitchen?
Renter-friendly options include over-the-door organizers, tension rods, adhesive hooks, stackable bins, and rolling utility carts. These cabinet storage hacks require no drilling and can be removed without damaging surfaces. Look for products labeled damage-free or no-drill, such as adhesive hooks or tension rods, which leave no residue and help you keep your security deposit intact.
How can I organize kitchen cabinets without drilling holes?
Use no-drill kitchen storage solutions like adhesive hooks, tension rods, and over-the-door racks. For example, place a tension rod under a shelf to hang spray bottles, or stick adhesive hooks inside doors for measuring spoons. These methods avoid screws and nails, so your cabinets stay damage-free. Always check weight limits to prevent falls.
Are tension rods useful for kitchen cabinet organization?
Yes, tension rods are versatile and affordable. You can install them vertically to separate cutting boards or horizontally to create a second tier for cleaning supplies. They require no hardware and adjust to fit most cabinet widths. Just ensure the rod is snug and avoid overloading it with heavy items to prevent slipping.
How do I maximize vertical space in a small rental kitchen?
Add shelf risers to double cabinet space, use stackable bins to group small items, and hang adhesive hooks on walls or inside doors. Over-the-door organizers and magnetic strips on the side of the fridge also free up counter space. These small kitchen cabinet hacks are budget-friendly and removable, making them ideal for renters.