

How to Organize Meal Prep Containers in Your Fridge
Table of Contents
- Clean Out Your Refrigerator First
- Categorize Your Food Items by Type
- Best Meal Prep Containers for Fridge Storage
- Refrigerator Shelf Organization Ideas
- Label and Track Your Meal Prep Storage Duration
- Maximize Vertical Space and Accessibility
- Maintain Your System and Prevent Common Mistakes
- Conclusion
Last Updated: August 23, 2026
Clean Out Your Refrigerator First
Before organizing meal prep containers, remove everything shelf by shelf and wipe down with a damp cloth to remove spills and buildup. Understanding your shelf depth and weight capacity matters when stacking containers, most refrigerator shelves safely handle 50-75 pounds when properly distributed (the FDA).
Check temperature zones: your fridge maintains 35-40°F overall, but the back of shelves runs colder than the front, and the door is warmest (the FDA). This matters for food safety, items requiring consistent cold storage shouldn't go on the door. Look for damaged seals, frost buildup, or restricted air circulation, which leads to moisture accumulation and faster spoilage. This 20-30 minute reset prevents recreating clutter and identifies organizational problems like broken shelves or weak lighting.
Categorize Your Food Items by Type
Organization starts with grouping similar items together using the FIFO method (First In, First Out), which ensures older items get used before newer ones and prevents waste.
Sort your meal prep containers by category: prepared meals, proteins, vegetables and fruits, dairy and condiments, and leftovers. Categorization reduces decision fatigue when searching for items and helps with inventory management. Within each category, arrange items by date, newer containers go to the back, older ones to the front. This physical arrangement enforces FIFO without constant mental tracking. Label each category zone if sharing your refrigerator so family members understand your system.
Best Meal Prep Containers for Fridge Storage
Not all containers are created equal for refrigerator storage. The right choice depends on your meal prep volume, available space, and storage duration.
Clear Containers and Acrylic Bins
Clear containers are the foundation of visible meal prep storage. You can see contents without opening the container, which saves time and prevents unnecessary air exposure that dries out food.
Look for BPA-free plastic or glass containers. Glass lasts longer and doesn't stain or retain odors, but it's heavier and takes up more space. Plastic is lighter and stackable, ideal for vertical storage in tight refrigerators. Acrylic bins offer a middle ground, more durable than standard plastic, resistant to staining, and providing excellent visibility. Many come with removable dividers for customized organization.
The key advantage of clear containers is accessibility. You don't waste time searching through opaque storage and notice when items run low, helping you plan your next meal prep session.
Viva homeStore offers a curated selection of clear storage solutions designed specifically for meal prep organization. The transparent design means you can scan your inventory without opening the refrigerator door repeatedly, maintaining temperature stability.
Stackable and Modular Options
Stackable containers maximize vertical space, especially important in smaller fridges where horizontal shelf space is limited. Look for containers with secure, interlocking lids that prevent stacking from becoming unstable. Quality stackable containers have flat bases and lids that nest together when empty, reducing storage space for the containers themselves.
Modular systems let you combine different container sizes, adapting to your actual meal prep portions. Consider containers with portion-control markings, which help maintain consistent meal sizes and are useful for people tracking macros or following specific diet plans.
Refrigerator Shelf Organization Ideas
Your shelf layout determines how efficiently you use space and how easily you access what you need.
Understanding Temperature Zones
The coldest zone is the back of lower shelves, typically 33-35°F, ideal for raw proteins. Upper shelves run slightly warmer, around 37-40°F, suitable for prepared meals and leftovers. The door is the warmest zone, sometimes reaching 45°F, best for condiments and dressings, never for proteins.
Organize your meal prep containers on middle shelves where temperature is most stable and consistent. Position containers toward the back where it's coldest, but ensure air can circulate around them.
Weight Distribution and Shelf Load
Proper weight distribution prevents shelf sagging and maintains structural integrity. Heavy items should go on lower shelves. Never overload upper shelves with dense, heavy containers.
When stacking containers vertically, place heavier containers on lower stacks. Leave space between the back wall and your containers, a gap of 2-3 inches allows air circulation to maintain proper temperature and prevent frost buildup.
Label and Track Your Meal Prep Storage Duration
Labeling prevents food waste and ensures food safety. Use waterproof labels that stick to plastic and glass. Write the contents and the date prepared, for example: "Chicken, rice, broccoli, 8/23." Include the "use by" date directly on the label.
Most prepared meals last 3-4 days in the refrigerator. Cooked proteins last 3-4 days, cooked grains last 4-5 days, and cooked vegetables last 3-5 days (the FDA). Raw vegetables last 5-7 days depending on type.
On meal prep day, move older containers to eye level at the front of your fridge as a visual reminder to use them before expiration. Consider a simple spreadsheet or phone note tracking contents and dates, especially helpful if multiple people share the refrigerator.
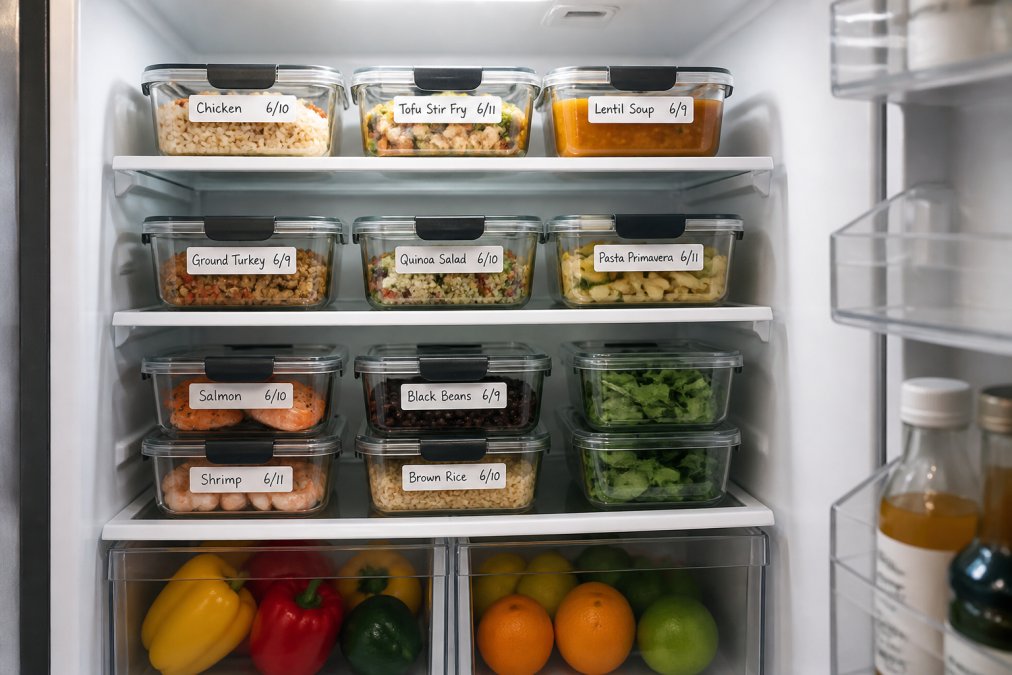
Maximize Vertical Space and Accessibility
Vertical storage transforms a cramped refrigerator into an efficient system. Use stackable meal prep containers to build upward rather than outward, freeing up horizontal shelf area.
Position frequently used containers at eye level for easy access. Create an accessibility zone for people with limited mobility by dedicating a middle shelf as the primary access zone. Use the space above containers for items that don't stack, like small bottles or jars.
Install shelf risers or stackable organizers to create additional levels within existing shelves, essentially doubling usable space. Consider pull-out bins or sliding drawer organizers that let you slide out an entire section of meal prep containers rather than reaching to the back.
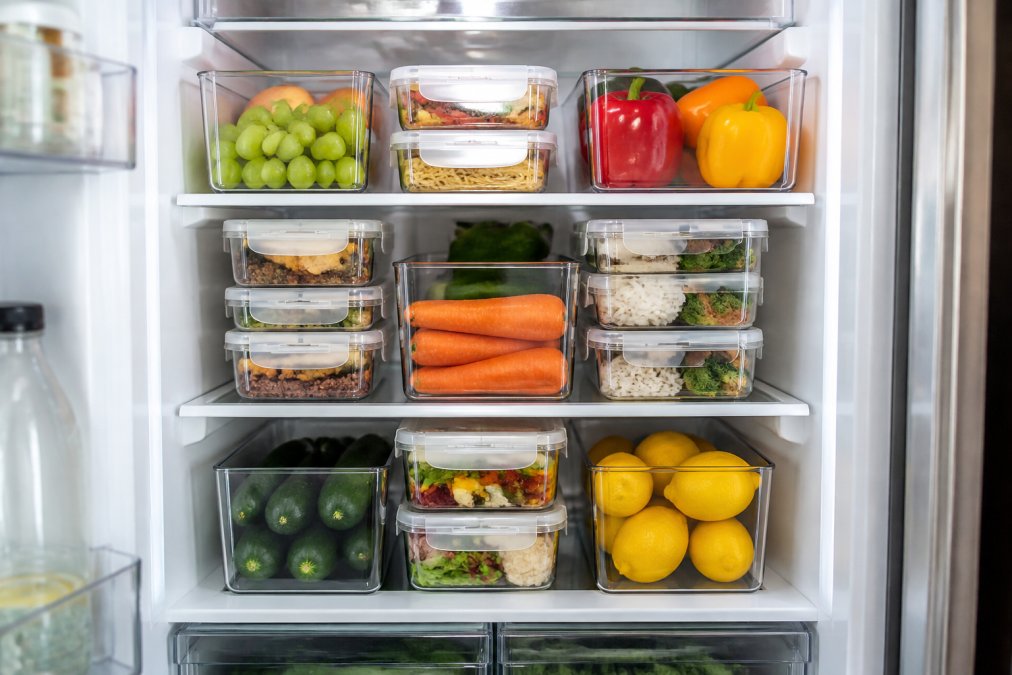
Maintain Your System and Prevent Common Mistakes
Organization only works if you maintain it.
Common Mistake #1: Mixing organized and disorganized storage. Once organized, resist adding random items to meal prep shelves. Keep your meal prep zone dedicated to meal prep.
Common Mistake #2: Overfilling containers. Fill containers to about 80-90% capacity, leaving room for expansion and easy stacking.
Common Mistake #3: Ignoring temperature zones. Review temperature zones monthly to ensure items are in appropriate locations.
Common Mistake #4: Forgetting to clean containers before storing. Wipe containers before placing them in the refrigerator to prevent cross-contamination and keep your fridge clean.
Weekly maintenance takes 10-15 minutes. Check for expired items, wipe spills, and reorganize if items have shifted.
Rotate your meal prep containers seasonally. In summer when you have fresh produce, your organization might shift. In winter when you rely more on prepared meals, your system might need adjustment.
Organizing meal prep containers in your fridge transforms how efficiently your household operates. The system you build saves time during busy weekdays, reduces food waste, and makes meal planning simpler. Start by cleaning out your refrigerator, categorize your items by type and temperature zone, invest in quality clear containers, and label everything with dates.
At Viva homeStore, we understand that functional storage is the foundation of an organized home. Our curated selection of clear containers, acrylic bins, and refrigerator organizers are designed to work together, creating a system that adapts to your actual meal prep needs. Visit Viva homeStore to find the storage solutions that transform your refrigerator into an efficient meal prep hub. Shop now and discover how the right containers make organization effortless.
Frequently Asked Questions
How should I organize my fridge for meal prep?
Start by cleaning out your fridge and removing expired items. Categorize your meal prep containers by type (proteins, vegetables, grains), then place them on shelves according to temperature zones. Keep frequently used containers at eye level for easy access. Use clear containers so you can see contents without opening them. Label each container with the contents and date prepared. This system improves food safety, reduces waste, and makes meal prep retrieval faster during busy weekdays.
What is the best meal prep storage duration in the refrigerator?
Most cooked meal prep containers last 3-4 days in the refrigerator when stored properly at 40°F or below. Raw vegetables in clear containers typically stay fresh for 5-7 days. Proteins like chicken or fish are safest within 3 days. Always label containers with the preparation date to track freshness. Use the FIFO method (first in, first out) to ensure older meals are eaten first. Proper air circulation and consistent temperature help extend storage duration.
Should containers be stored with lids on or off?
Always store meal prep containers with lids on to maintain food safety and prevent cross-contamination. Sealed containers preserve freshness longer and prevent odors from spreading throughout your fridge. However, allow containers to cool to room temperature before sealing to prevent condensation buildup, which can promote bacterial growth. Ensure lids fit securely and that containers are stackable to maximize vertical space while keeping contents protected.
How do I know if my fridge organization system is working?
Your system is working if you can quickly locate containers without searching, if food waste decreases, and if meals stay fresh for their intended storage duration. Track visibility by ensuring all containers are easily visible without moving others. Monitor accessibility by checking that frequently used items are at eye level. Assess sustainability by noting whether you're finishing meal prep containers before expiration. Adjust shelf placement, container types, or labeling if any of these factors decline.
This article was written using GrandRanker